| Review : | |
| Mielke Tuned Exhaust Pipe | |
|
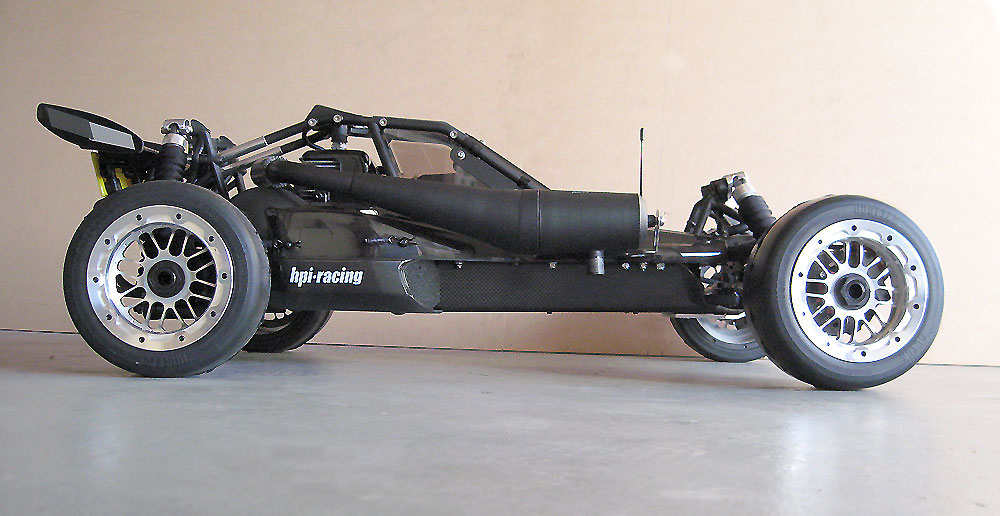
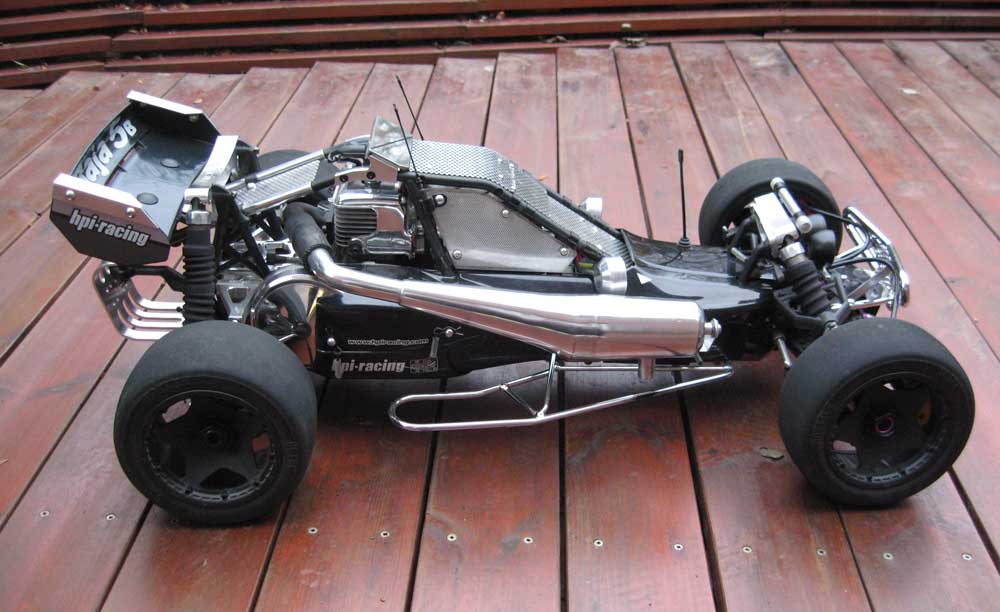
No matter how much I love the rear Dominator exhaust - something had to be done about that insanely loud noise - so it was that I went from probably one of the loudest to probably one of the quietest pipes..... ....And I must say I love the Mielke. The sound is a very appealing 'quiet' thunderous roar - something that could easily be listened to all day. Dare I say it but the 'Dom' was almost embarrassingly loud by comparison. |
|
 |
|
 |
|
 |
|
|
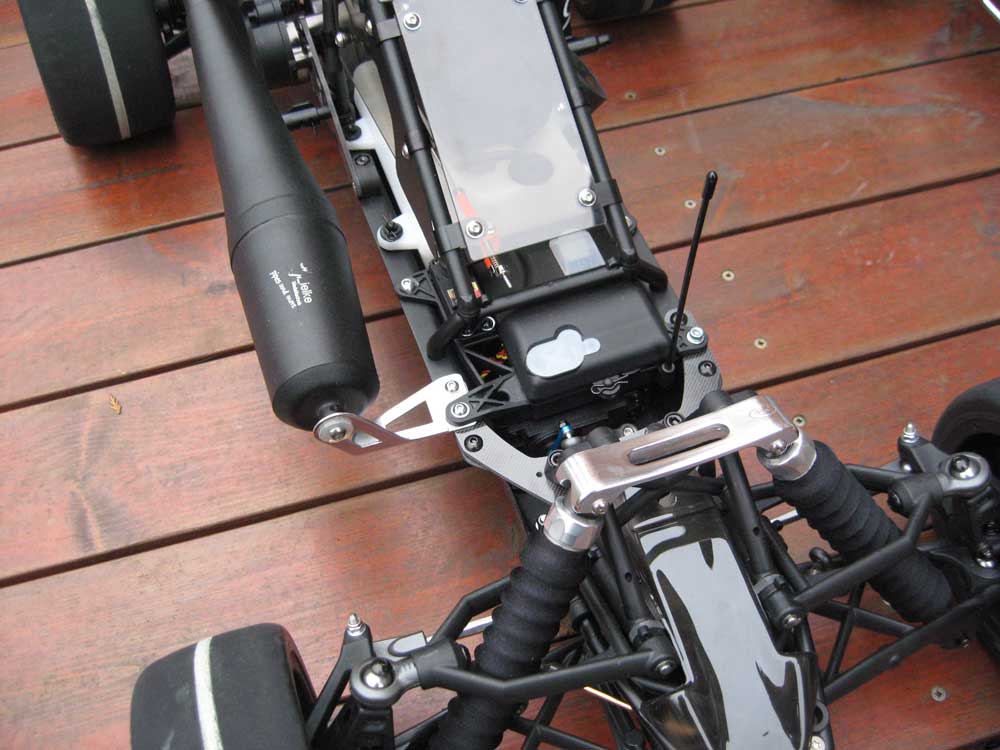
If
mounting the pipe with the wire bracket that comes with the Mielke,
apart from the lack of robustness of the part, be aware that the pipe
will lie close to, or even touch the body, resulting in localised
melting of the lexan body.
The bracket modification was originally posted by Lunatik Engineering on the hpibajaforum a while ago and repeated in the post link below. |
|
|
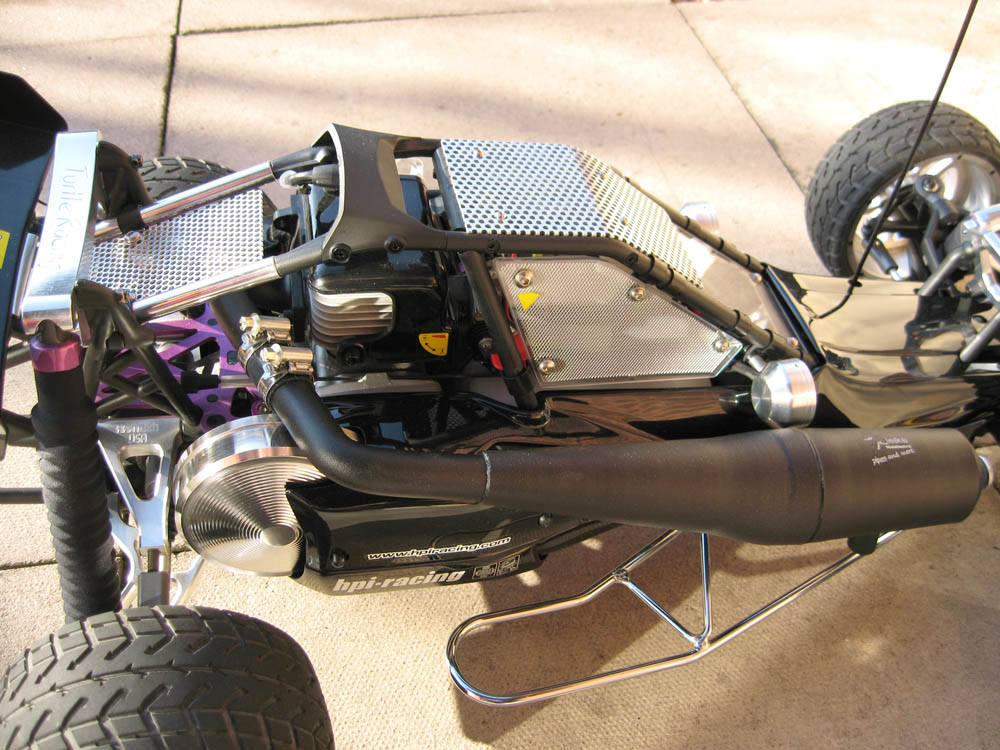
The
stock plastic type connector (on which the two jubilee clips fit) was replaced
with some black (poly reinforced) silicone tube which gives an
improvement over the stiff connection made with the stock connector and
some flexibility in a bad smash or roll. New jubilee clips will be required - 22-30mm size, as the ones that come with the pipe will probably be a bit on the small size for the new tube). Having said this - the 19mm is a good tight fit and therefore one clip fitted around the header pipe side should suffice – this will also prevent any vibration marks from occurring on the top the gear cover (particularly relevant if a billet gear cover is installed) and make for easy removal of the pipe during maintenance. Alternatively two heavy duty cable ties can be used – jubilee clips can be tightened too much resulting in deformed pipe ends, resulting in exhaust residue leakage. One of the the good things about the Mielke is that it is very easy to remove and install at the joint with the header pipe. This makes for quick and easy maintenance without exposing the exhaust port directly to potential contamination - simply plug / tape up the header pipe joint end during maintenance. The silicone hose can be left in place, attached to the main pipe, with the cable tie at the header/engine side cut. After first removing the bracket connection screw, the main pipe can then be carefully twisted off with the hose intact. |
|
 |
|
 |
|
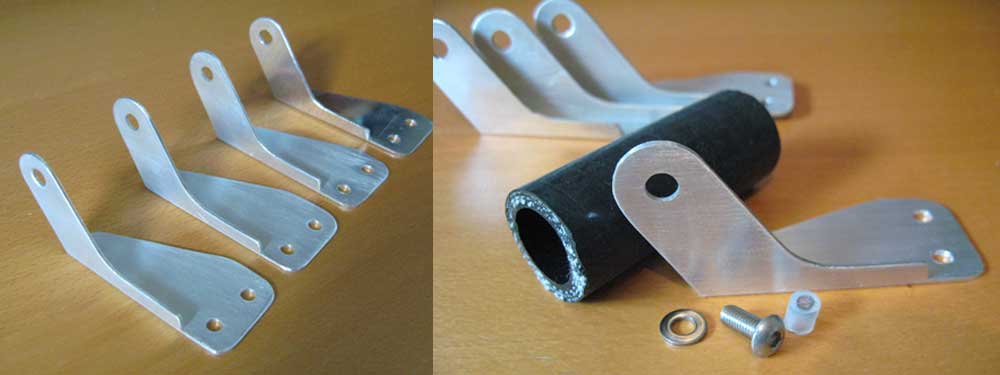 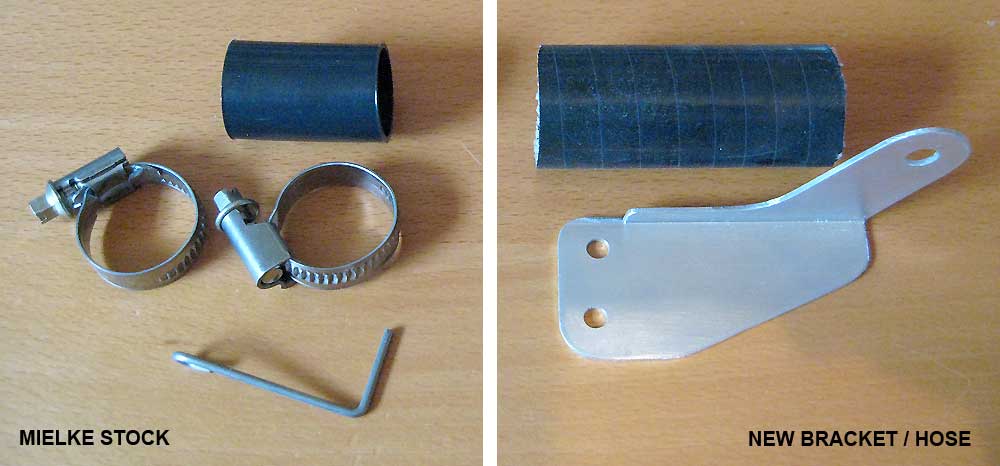 Custom DIY Brackets Relatively easy to make, there are numerous options (one bolt fix, two bolt etc) - more details and comments can be found in the Mielke thread (link at bottom of page), including parts, sizes and where to buy items. They are made from 1.0mm thick aluminium angle and are designed to replace the Mielke stock wire bracket, which as some of you know is not up to the basic task of securing the pipe end. The stock wire (above left) also holds the pipe close to (if not touching), the lexan body – resulting in potentially wrecking your nice paint job, as well as making it a chore to remove the body. This bracket allows relatively easy removal of the body, no melting issues, and needless to say, secures the pipe end more robustly. Even with the bracket modification, the pipe still lies close enough to the body to give a good measure of protection in a roll over (subject to terrain, of course), particularly when compared with some other side pipes. Probably a wise thing being made from relatively easily dented aluminium. Nevertheless side collisions are often inevitable and all pipes will be at risk to some degree or other. The correct choice of alu thickness (eg. 1.5mm) will allow the bracket to bend in the event of a severe side impact. This, together with the flex in the silicone hose will help limit damage to the aluminium pipe and engine block, on the premise that it is better to have a bent bracket and a potentially smaller dent in the pipe than a write-off Mielke and damaged block. A recess will probably be required where the bracket meets the lexan upper body. Two M5 holes drilled in the bracket allow for connection to the chassis. One for the pem bolt location and the other for the use of an M5 bolt/nut to secure the radio box. Alternative fixings can be used for the radio box by increasing the diam of the hole as necessary. The bracket can be mounted either above or below the front Y top plate. Case study examples – 1 - Bracket with Scorpion chassis, TR HD Top plate, fixed with nuts and bolts (no pemserts). Bracket fixed below the Y plate (see pic below, left side) The 1.5mm thickness will of course raise the Y plate on side marginally but the bracket thickness is a good compromise. A bracket option could also be fitted below the main chassis shelf (to eliminate marginal rasie of the Y plate), but the examples here have not been designed for such use, and would rely on the use of nuts/bolts and no pemserts. 2 – Bracket with CF Chassis, CF Y plate, fixed with nuts and bolts. Bracket fixed above the CF Y plate but below the radio box fixing arm. Again the 1.5mm thickness will raise the radio box one side. (see pic below, right side) 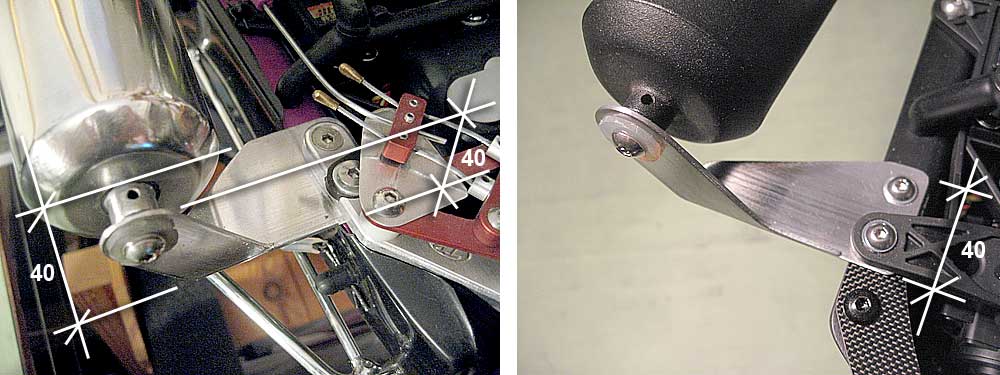 3 – Bracket with Stock Chassis, stock Y plate, fixed with M5 bolts into stock chassis pemserts. Bracket fixed above the Y plate with button screws (see below). All parts flush fit. Bracket increases the end height of the Mielke by a few mm. 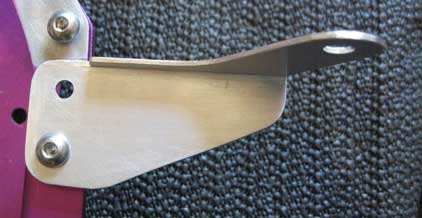 Note the washer/grommet detail below differs from the above pics (which show a regular rubber washer arrangement). This version helps improve the dampening of vibrations, where the fuel tube forms a sleeve to the M5 screw, and the assembly is then inserted through the upright face of the bracket to connect to the pipe end. 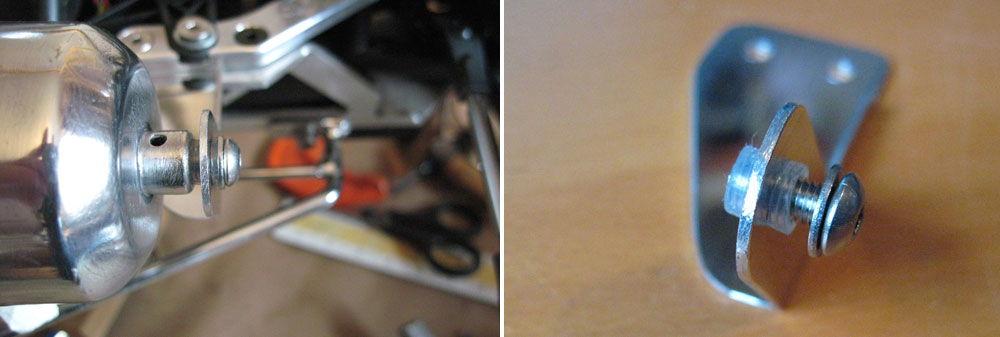 A typical parts list for a kit could include the following; 1 x alu bracket (fabricated from raw aluminium angle 40 x 40 x 1mm / 1.5"x1.5") 1 x stainless steel washer M5 1 x M5 x 12 hex button screw 1 x fuel tube 'washer' - approx 8mm 1 x 65mm length of silicone hose, ID 19mm, reinforced wall 4mm, OD 27mm (as a replacement for the stiff stock Mielke connector, which uses jubilee clips). NB, the ID 19mm silicone hose is a nice snug fit and can successfully be run without any additional fixings. If hard bashing is your game, you may wish to use cable ties or jubilee clips as extra security. |
|
| Original forum thread and comments detailed at Mielke - LOVE IT! - HPIBajaForum | |